

How To Make Laptop Skins
It'due south always fun to add a little personality and customization to the electronic devices nosotros use every day. This customization is easy with colorful laptop decals. And why buy something when you take a Cricut and can chop-chop and easily make your own custom laptop peel at home? In this tutorial, you'll run across how uncomplicated information technology is to make your own DIY laptop decal with Cricut.
In this post, I provide several free original designs that you can use with Cricut'southward print then cut and customize right in Design Space. But, I also want you to know that it is simple to brand your own in Procreate!
- A Quick Tip for the Sticker Seller
- Scout the Video on YouTube!
- Do You Need a Cricut to Make a Laptop Decal?
- How to Make a Laptop Decal with Cricut
- What's Side by side?
- Love this? Share it!
- Squirrel Much? 🐿
Printable Vinyl vs. Sticker Paper
For this projection, yous need to use Printable Vinyl. It'southward made of a dissimilar cloth than newspaper-based sticker paper that is easier to peel off and reposition. No 1 wants a laptop decal that isn't removable or damages the surface of their tech!
Not sure if yous want to put printable vinyl on your laptop? You could try a scrap of vinyl or a minor vinyl decal on the lesser of your laptop commencement. But I tested the "removability" and had zero bug when I used the printable vinyl.
Simply to be totally transparent I did non examination this with other laptop models- just the MacBook air and the Macbook pro that I had bachelor.
Articulate vs. White Printable Vinyl
For silver laptops, I recommend articulate printable vinyl. For night laptops, use the white printable vinyl in either Matte or Glossy. In the gratuitous design aught files for this project, I accept regular and "nighttime" options.
The difference is that the dark designs are meant to be used with the white printable vinyl- and don't take a edge around the sticker. It's a lilliputian cleaner wait, and you won't seem like you have a giant sticker on your machine every bit much as you have a decal (or skin).
A Quick Tip for the Sticker Seller
If y'all make stickers and desire to aggrandize your product line, this is a great selection as the technique is pretty much the same as making stickers. The only differences are the size of the sticker and the textile you'll print on.
Watch the Video on YouTube!
If you lot prefer video tutorials I practise have this posted on my Well Crafted Studio YouTube channel with other not bad Cricut tutorials. Check the playlists for Sticker or Procreate tutorials too!
Do You lot Demand a Cricut to Make a Laptop Decal?
Non for this tutorial. You tin can print your pattern straight from Procreate as a PDF and utilize a scissors.
BUT if you have a Cricut you'll go the all-time results, and I think the rounded edges are a really nice professional person-looking finishing touch.
How to Make a Laptop Decal with Cricut
Tools and Materials
- Free Purpose Laptop Decal Design or the Blank Laptop Blueprint (in the Gratuitous Library under Stickers)
- Ruler (to get the correct size for your laptop)
- Clear Printable Vinyl Sheets* for Inkjet (if you have a laser printer you'll want to get vinyl that works with that.)
- Inkjet Printer or Laser Printer, I Honey my Catechism Crafter's Printer
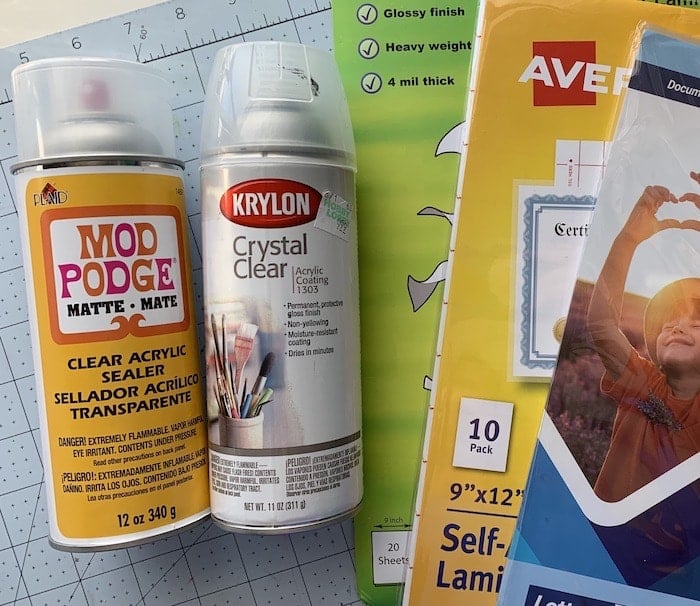
- Spray Acrylic Sealer like Krylon's Crystal Articulate, or Mod Podge Spray Matte Sealer. (OR you can utilize a laminate to add a articulate overlay and protective layer to your design).
- Cricut Maker, or a Cricut Explore Air 2
- Lite Grip Cricut Cutting Mat (I like the Light Grip so that my bankroll newspaper doesn't stick to the mat. You can use a Standard Mat)
- Painter'due south Tape (or another light-adhesive tape)
- Old credit card or hotel fundamental carte
- Newspaper Trimmer (to cut off the registration box and backlog bankroll paper around the blueprint.)
* Keep in listen that white does not print and shows clear. If you desire to proceed the white OR if you're using a night colour laptop you may want to use WHITE Printable Vinyl (and choose 1 of the complimentary designs that say "night" in the file name) if you'd similar to avoid the white border.
Directions to DIY a Laptop Skin with Cricut
Step One: Upload the Design from the Gratis Library
Open up the Creative Resources Library.* Scroll down until you reach Printable Art and Stickers. We want Purpose Laptop Skin.Click on the link to download. Double click or click and concur for options and choose to save to downloads. Open the zip file.
Note: Y'all tin use your own images if you lot take Adobe Creative Cloud, Procreate, or another design programme. You could fifty-fifty just describe something and take a photograph of it to brand your own custom laptop skin. I love that! My free designs are there to give you an piece of cake way to follow the tutorial and get something you'll love.
*For Admission to the Library, You'll Need the Password. You'll become that instantly when you sign upwards through one of the opt-ins on this page.
Pace Two: Open a New Sheet and Upload the Design
Open up upwardly Cricut Pattern Space for desktop and cull New Canvas. Click the Upload pick from the toolbar on the left side of the web page. Cull Scan. This should open up your files on your computer.
For this tutorial, we're going to select the Purpose Laptop Peel PNG design OR the Blank Laptop Skin PNG design. BUT I do have several different designs for you to choose from in my Complimentary Library!
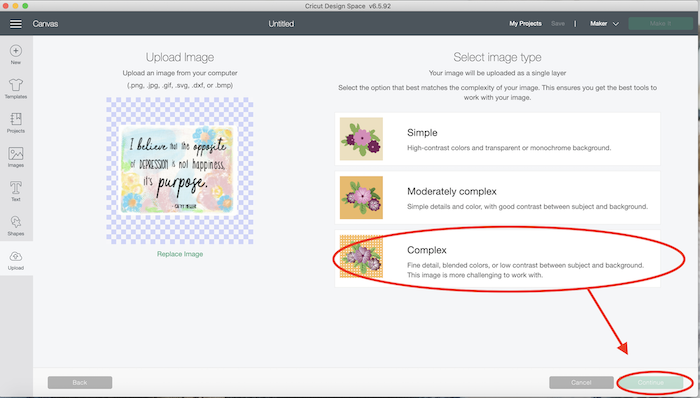
Choose Complex when asked, the Proceed.
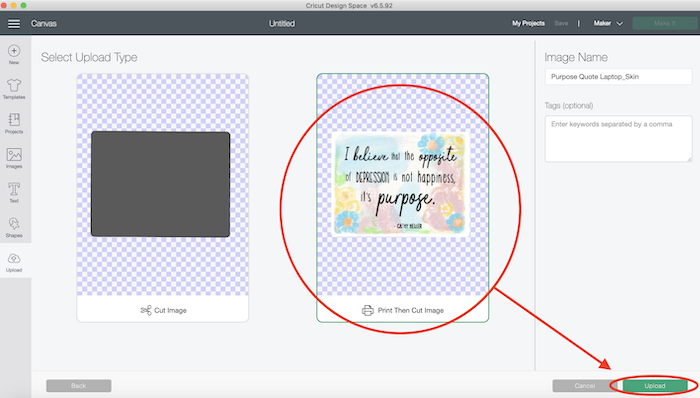
Skip the Clean-upwardly page, and then Salve equally a Impress so Cut file.
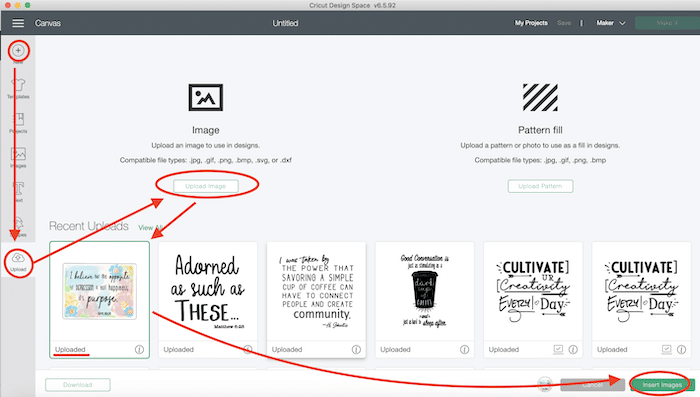
This volition add together it to your Uploaded Images. Click to Select it, and then tap Insert Images in the bottom correct corner. Now you'll see it on your canvas.
Size 3: Size to Fit Your Laptop
First, be aware that the MAX you can impress then cut with a Cricut is 6.75 x 9.25. I found that I didn't demand my blueprint to exist larger than that for my MacBook Air (I also tested this with a MacBook Pro). You lot can change the size in the top toolbar.
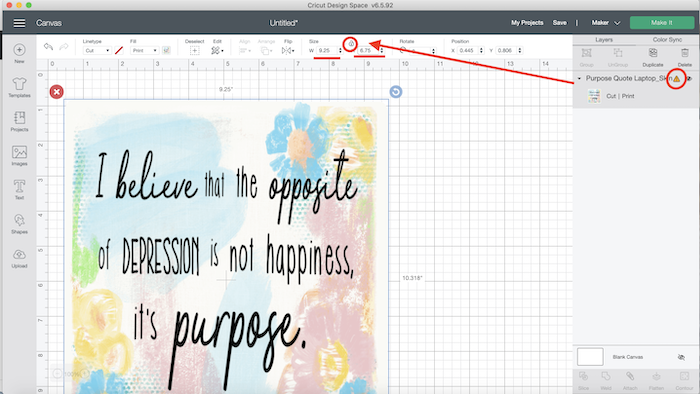
Then, y'all'll demand to know how big the cover of your laptop is. Use a ruler. If you recollect y'all'd like your skin to be smaller than the 6.75″ ten 9.25″ and so you'll need to adapt the size. IF you'd like to modify the constraints a little you tin can. To do this just Unlock the little lock icon above Size in the height toolbar. And then blazon in your height and width.
Want to Practice a Larger Version of this Laptop Pare?
Not the correct size vinyl decal for you? YOU CAN do a larger print if y'all don't become through Cricut'due south Print then Cut to do information technology.
But save your pattern equally a cutting file and so print on your home printer. When it's fourth dimension to cut your designs, align your cutting images with your printed image. This allows you to cut as large as xi.5″ x eleven.5″.
Stride Four: Add together Your Ain Text (optional)
Click on the Text icon in the side toolbar. This opens upwards the Text Panel. Type in the text you'd like and then position it as desired on the mat. Change the fonts/size as desired.
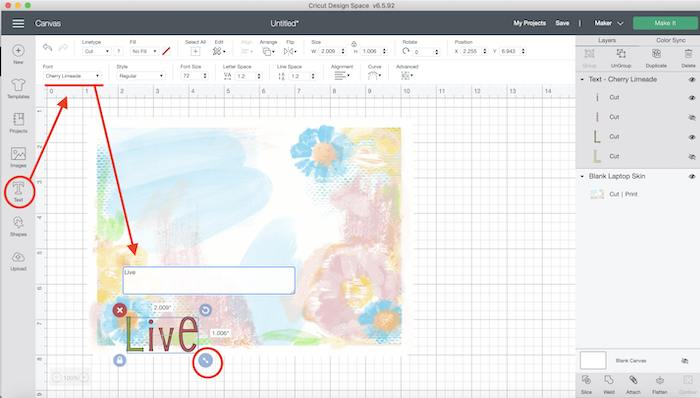
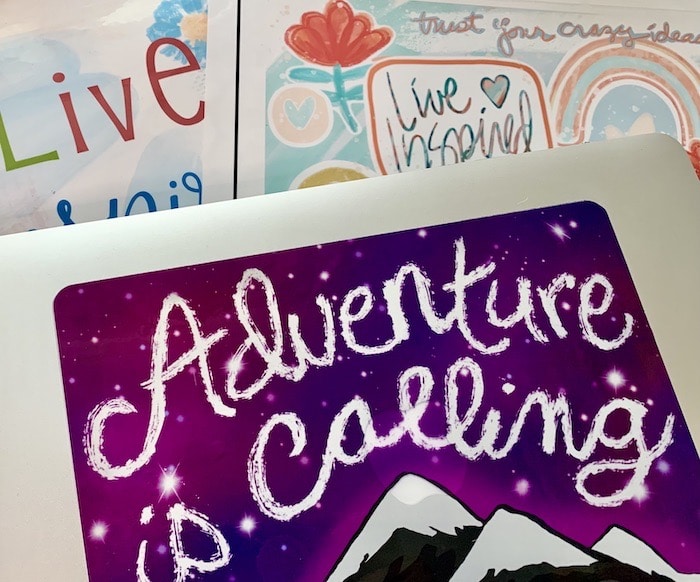
In my tutorial, for my text "Live" I'm using the Cherry Lemonade font which is a Cricut font.
Note: I similar to do 1 word at a time so that I have the choice to change up the size/font/ kerning for each word individually. These are options in the top text panel. If yous are using a cursive font you can ungroup the letters and move them together, and so Weld them together if you were doing a cutting. For impress and so cut it won't really thing as we Flatten the design.
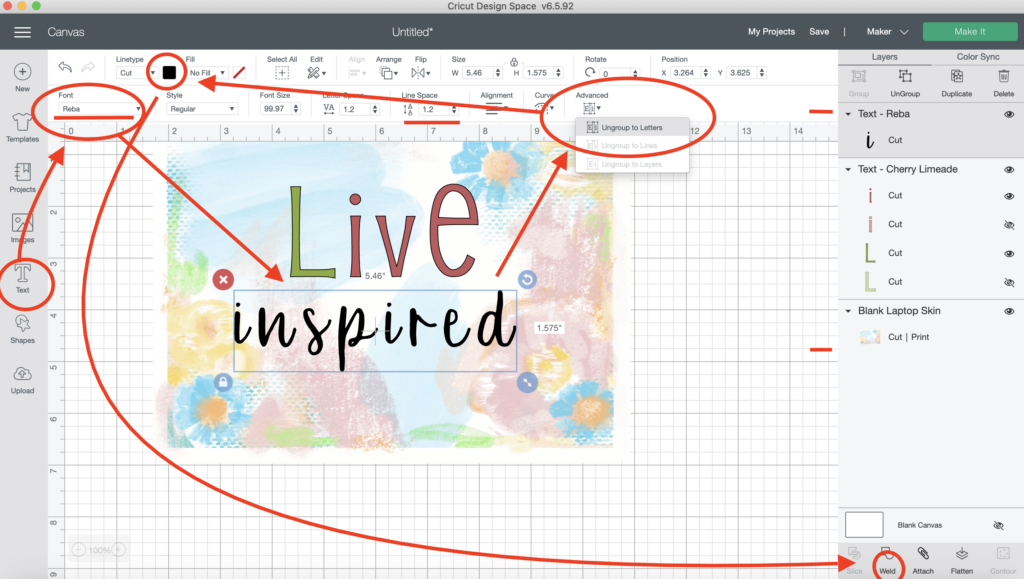
Once you lot've got everything the manner you'd similar select all the text and Attach. So Select All, go to Marshal>Center, then Flatten. This action can exist undone. Simply it'southward essentially telling your machine that you want information technology all to be a single print and so cut.
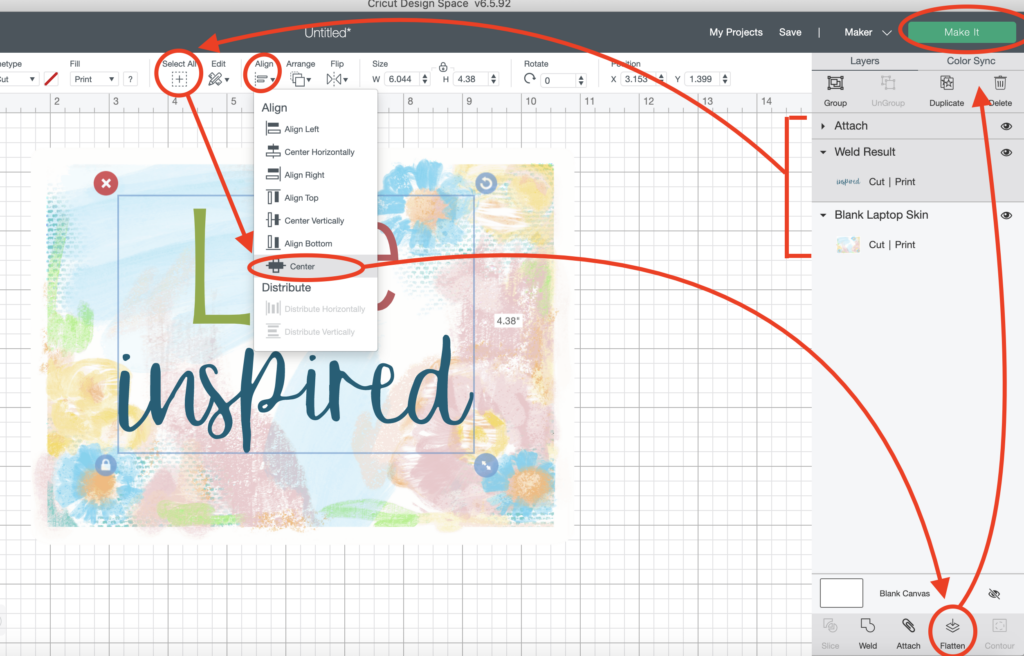
Save your project so striking Brand information technology!
Step Five: Print It
Load your Printable Vinyl into your printer.
On your screen, y'all'll run into a print box- toggle off bleed. Then, if you lot desire to use your printer's dialog box, toggle on System Dialog*. Hit Print.
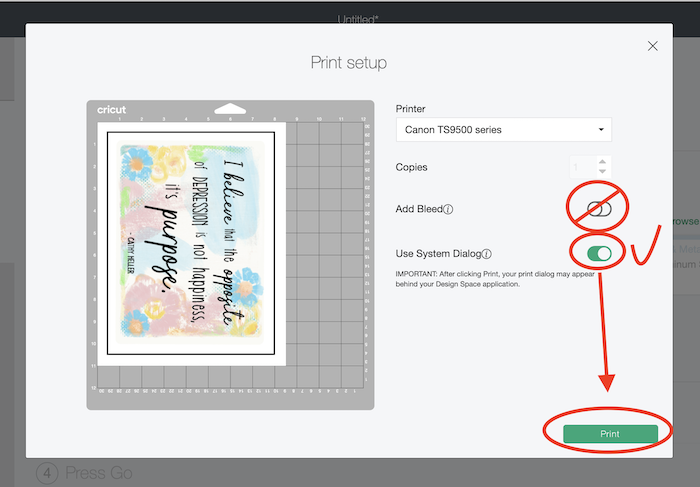
This will open the System Dialog backside your screen. So you will have to minimize your Blueprint Infinite carte in gild to come across the printer options.
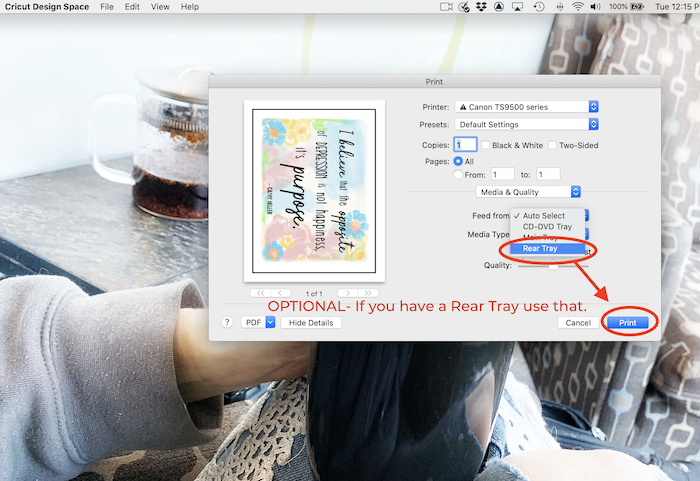
* I prefer to use the System Dialog selection then I can cull if I want to employ my Main Tray or Rear Tray selection on my Catechism Crafter'due south Printer. I love having the option of putting my thicker papers like cardstock and thick sticker paper through the rear-feed and so they don't get stuck inside the printer.
You practice Non have to accept a printer like this to do this project. Wondering nigh the Quality pick? I leave it at the default merely you tin can experiment to find a setting you like best.
Step Six: Seal Your Design (optional)
Most printable vinyl is already water-resistant or waterproof by nature. The ink is absorbed into the vinyl and is somewhat protected from normal vesture and tear. Even so, many people now utilise their laptops in all kinds of spaces other than only a desk-bound in an office.
This means the laptop is getting pulled in and out of bags, having things stacked on top of them, or exposed to other deportment which could scratch the surface of your vinyl laptop pare.
SO if I were to sell these, I would be sure to seal the ink.
I tried Krylon's Crystal Clear and Mod Podge's Acrylic droplets sealers because I already had them. I really liked the results, and that it's pretty much invisible. Lots of people also recommend Krylon'southward UV Sealer.
For more on creating waterproof and more durable stickers, check out this post past Imperial Elements, Waterproofing, Laminating, and Creating Extra Durable Stickers.
Of import! If y'all do make up one's mind to seal your work exist sure to read the manufacturer'due south directions and use the proper safety measures!
Stride Vii: Cutting the Printable Vinyl
Place your printed prototype on your Light Grip Cut Mat as shown on the Mat Preview Page. Press downwards firmly or apply a brayer.
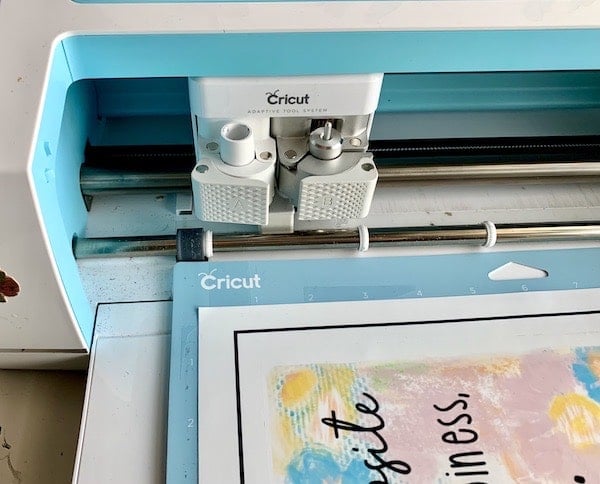
Choose Premium Vinyl from the material settings and and then Load your mat. Follow the prompts on your motorcar- insert your fine point bract, and and then printing the blinking Go (C) button. When it'south finished check to make certain it cut cleanly through the vinyl and And so Unload your mat.
This is for a kiss-cut that leaves the bankroll newspaper intact vs. a die-cut that cuts through the backing.
Note: IF you cheque before you unload the mat so you accept the option of repeating the cut by pressing the Go button again. And so make this a habit!
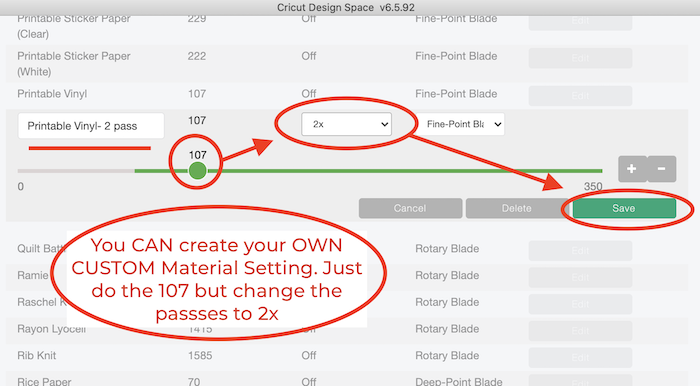
About Material Setting: I establish that the Printable Vinyl and Premium Vinyl settings were the aforementioned. Both accept a pressure of 107 and are one laissez passer. I needed 2 passes to cut through the Printable Vinyl that I was using. BUT your feel may differ if you're using a different type of printable vinyl.
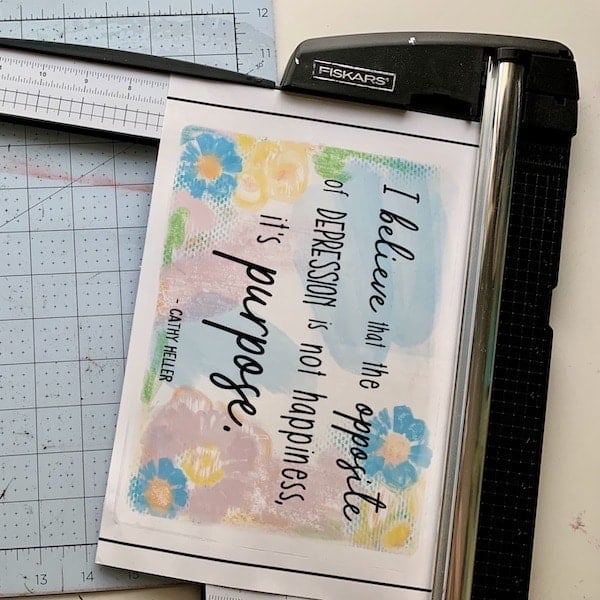
Pace 8: Trim the Sail
Using a small folio trimmer or a guillotine cutter trim off the black lines. OR every bit an alternative, you can just pull the backlog vinyl off of the bankroll paper and discard it.
Having a fiddling bit of the blistering newspaper as an edge will give your sticker a nice presentation if you plan to sell them.
Step 9: Apply Your Fine art to the Laptop
Make sure your surface is make clean and costless of lint. I used an alcohol-based wipe to practice a quick once over and and so let it dry before I practical my laptop peel.
On a short edge trim the backing newspaper flush to the decal, or bend information technology back like I did in the video.
Heart your design on the laptop comprehend. Either put a piece of tape on the trimmed side of your design. This creates a "hinge".
Lift the top of the printed vinyl sheet and then get-go to curl back the bankroll paper.
Utilise the sometime rewards carte du jour as an application tool to polish the vinyl towards you lot. Commencement in the middle and polish out to the pattern's edges as you lot slowly pull towards you. Pay attention and push any air bubbles from the center to the edges.
Notation: I don't apply transfer tape to use my laptop skins but you certainly could do that and it might be easier to position the design just right.

Important: When I used my Cricut hard border scraper it pushed the bubbles likewise aggressively and they ended up popping. NOT what you lot want to have happen to your project!
Nervous? Don't exist! Considering nosotros're using Printable Vinyl not sticker paper you'll exist able to skin up and reposition your decal if needed.
This also makes removal at a future date super easy.
This is a MAJOR advantage to using printable vinyl. vs. clear sticker paper. Clear sticker paper would just tear.
Woohoo! You've Learned How Easy it is to Make a Laptop Skin with Cricut!
Now that you've tried this design, and seen how easy information technology is, you might desire to create your own design in Procreate. I take several tutorials on using Procreate hither on the blog, equally well every bit on my YouTube channel.
It'due south so super elementary- just create a design, round the corners, and and so export every bit a transparent PNG!
What's Adjacent?
Now that you've learned how to brand the laptop decal, maybe you want to try making a prison cell telephone skin. Or perchance decorate your phone case, or make trackpad decals. Cute piddling decals for your AirPods instance would be super fun too!
AND if you lot'd similar more printable vinyl projects you may want to check out my mail service, How to Brand Engraved Photo Ornaments. In it I utilize printable vinyl on metal flashing to make super cute personalized Christmas ornaments.
Love this? Share information technology!
If you lot found this tutorial fun or helpful I would Dear to take you lot share it on social media! Y'all can practice that with the icons below OR past saving the image beneath to your Pinterest page! Information technology really helps me abound my concern.
I'd also honey to have y'all tag #wellcraftedstudio on Instagram if you tried any of our diy projects and show me what you made!
And don't forget to check out More of my Cricut sticker tutorials. ❤️
Thanks for checking out this tutorial on how to make a laptop decal with Cricut!

Squirrel Much? 🐿
Here's My Tip On How To Recollect Where Yous Saw How to Make a Laptop Decal with Cricut ⬇️
I squirrel Manner likewise much and it helps me to save posts to my Pinterest boards or to Bookmark them. If you lot share this tendency, please experience free to pin the images in this post if you'd like!

Source: https://wellcraftedstudio.com/diy-laptop-skin-with-a-cricut/
Posted by: coyleworch1941.blogspot.com
0 Response to "How To Make Laptop Skins"
Post a Comment